

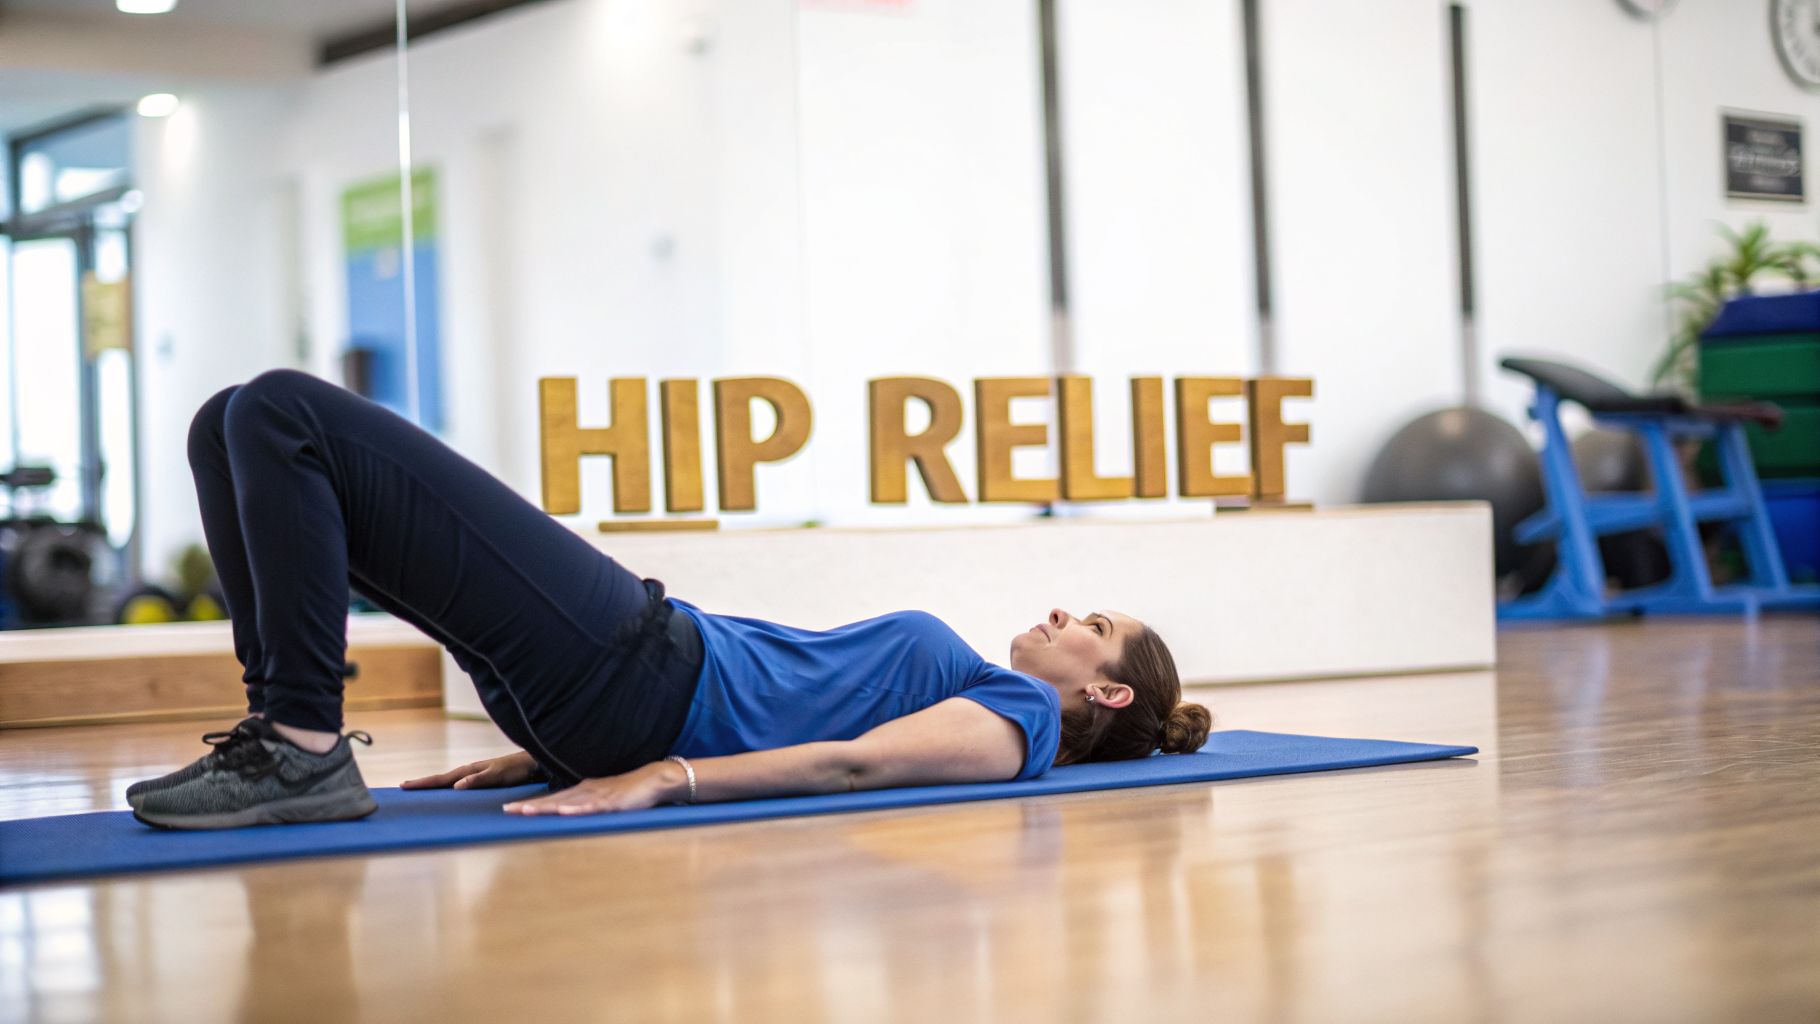
If you’ve stood up after a long day at your desk and felt that deep, nagging ache in your hips, you know why the supine figure 4 stretch is a non-negotiable for so many people. It’s one of the most direct and effective ways to release tension in your hip muscles, offering both immediate relief and a foundation for better long-term mobility.
Think of it as the reset button for your hips.
Why the supine figure 4 is a go-to for hip health
This stretch is a favorite among physical therapists, trainers, and athletes for its simplicity and powerful results. It targets a group of muscles that have become notoriously tight in our modern, sedentary world. By crossing one ankle over the opposite knee while lying on your back, you create the perfect angle to gently but firmly stretch the deep muscles of the hip.
The best part? It’s accessible. You don’t need fancy equipment or a high level of fitness—just a few feet of floor space and a couple of minutes to dedicate to your body.
Releasing your deep hip rotators
The primary targets of the supine figure 4 are the deep external rotators of the hip. This group includes the piriformis, a small but strong muscle located deep in your glutes that can cause major issues when it gets tight.
When the piriformis is shortened from hours of sitting or overworked from certain activities, it can press on the nearby sciatic nerve. This can lead to piriformis syndrome, a frustrating condition causing pain, tingling, or numbness that can travel down the back of your leg. Regular figure 4 stretching helps keep this muscle pliable, reducing the risk of that nerve irritation.
To give you a better sense of what you're working, here’s a breakdown of the main muscles involved.
Key muscles targeted by the supine figure 4 stretch
| Muscle Group | Function | Benefit of Stretching |
|---|---|---|
| Piriformis | External rotation of the hip | Relieves tension that can lead to sciatic nerve compression (piriformis syndrome). |
| Gluteus Medius & Minimus | Hip abduction and stabilization | Improves balance, gait mechanics, and stability during single-leg movements. |
| Tensor Fasciae Latae (TFL) | Hip flexion and internal rotation | Reduces tightness that contributes to IT band syndrome and lateral knee pain. |
These muscles work together to control how your hips move. Keeping them mobile is important for everything from walking comfortably to performing at your best in the gym.
Benefits beyond the piriformis
While the piriformis often gets the spotlight, this stretch is a multi-tasker. It also works on other hip muscles:
- Gluteus Medius and Minimus: Located on the side of your hip, these muscles stabilize your pelvis. Stretching them can directly improve your balance and walking pattern.
- Tensor Fasciae Latae (TFL): This muscle at the front of your hip connects to the IT band. Releasing tension in the TFL can help soothe that common tightness along the outside of your thigh.
Our modern lifestyles are a major contributor to hip tightness. A 2026 ergonomic study from Cornell University revealed that 52% of office workers who sit for over eight hours a day report experiencing tight hips. This can progress to piriformis syndrome in 6% to 8% of those cases.
The supine figure 4 is a direct countermeasure. Data from Hinge Health's 2025 virtual physical therapy trials showed a 78% reduction in pain for participants who performed the stretch twice daily for just two weeks. It also improved hip mobility 22% more than foam rolling alone.
The real value of the supine figure 4 is its ability to gently unwind the tension built up from hours of sitting. It restores mobility where we need it most, which can prevent other issues like lower back pain. You can learn more about how to go beyond the gym to improve joint mobility and flexibility in our related article.
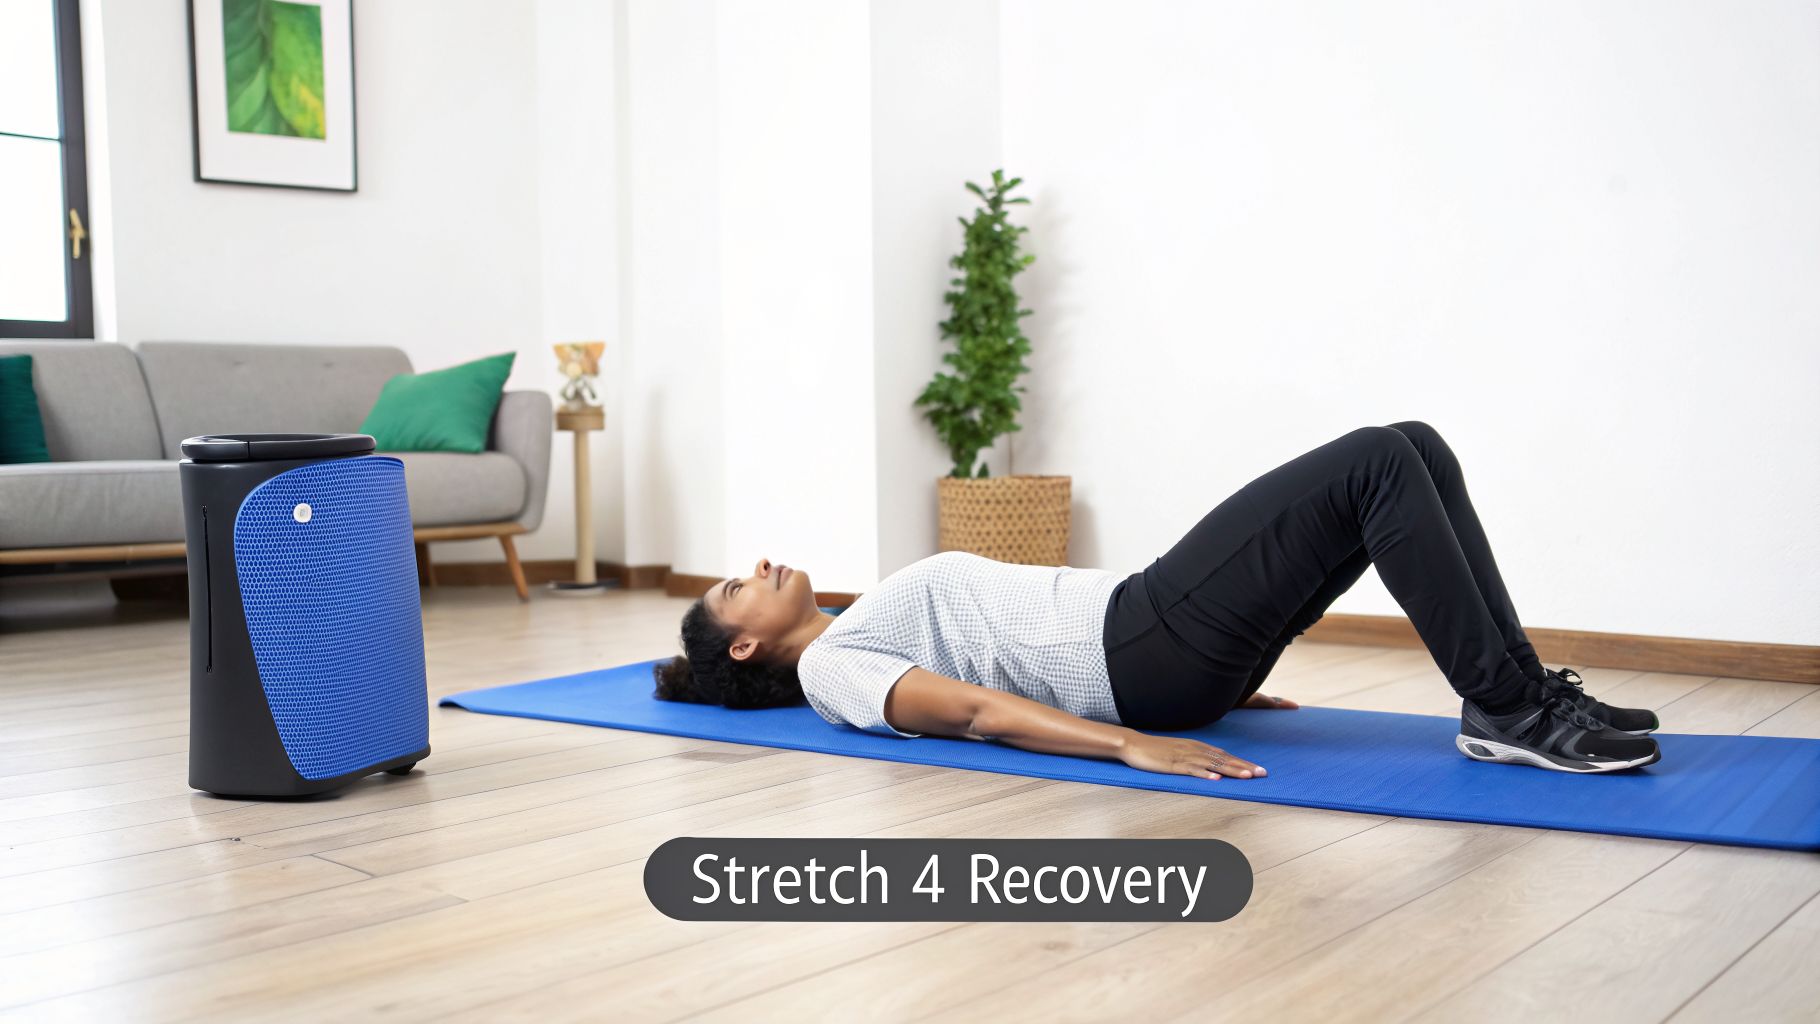
How to perform the supine figure 4 stretch correctly
Getting the supine figure 4 stretch right is about the details. When you nail the form, you’ll unlock a deep release in your piriformis and other hip rotators—muscles that get tight from sitting or intense activity. Let's walk through it so you can feel the difference.
A yoga mat or a carpeted floor is the perfect spot to get started.
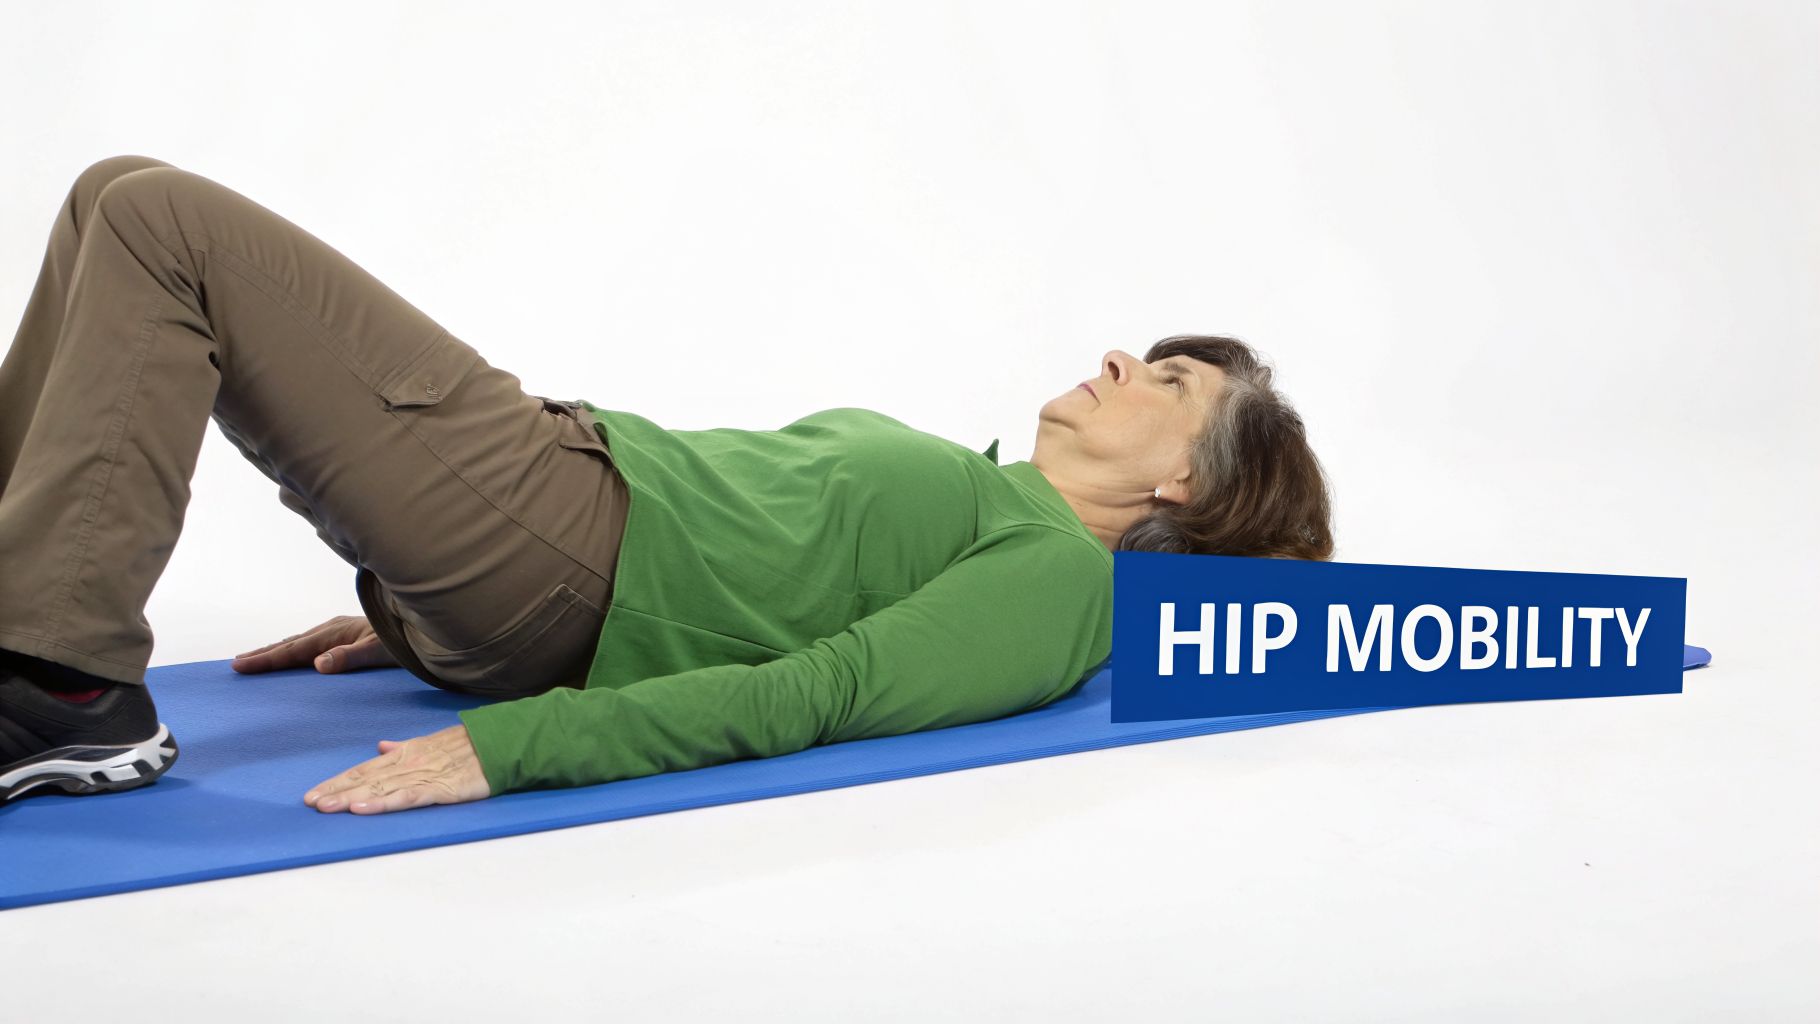
Getting into position
Begin by lying on your back. Bend your knees and place both feet flat on the floor, about hip-width apart. Let your arms rest comfortably at your sides, and make sure your head, shoulders, and lower back are settled on the ground. This neutral spine is your foundation.
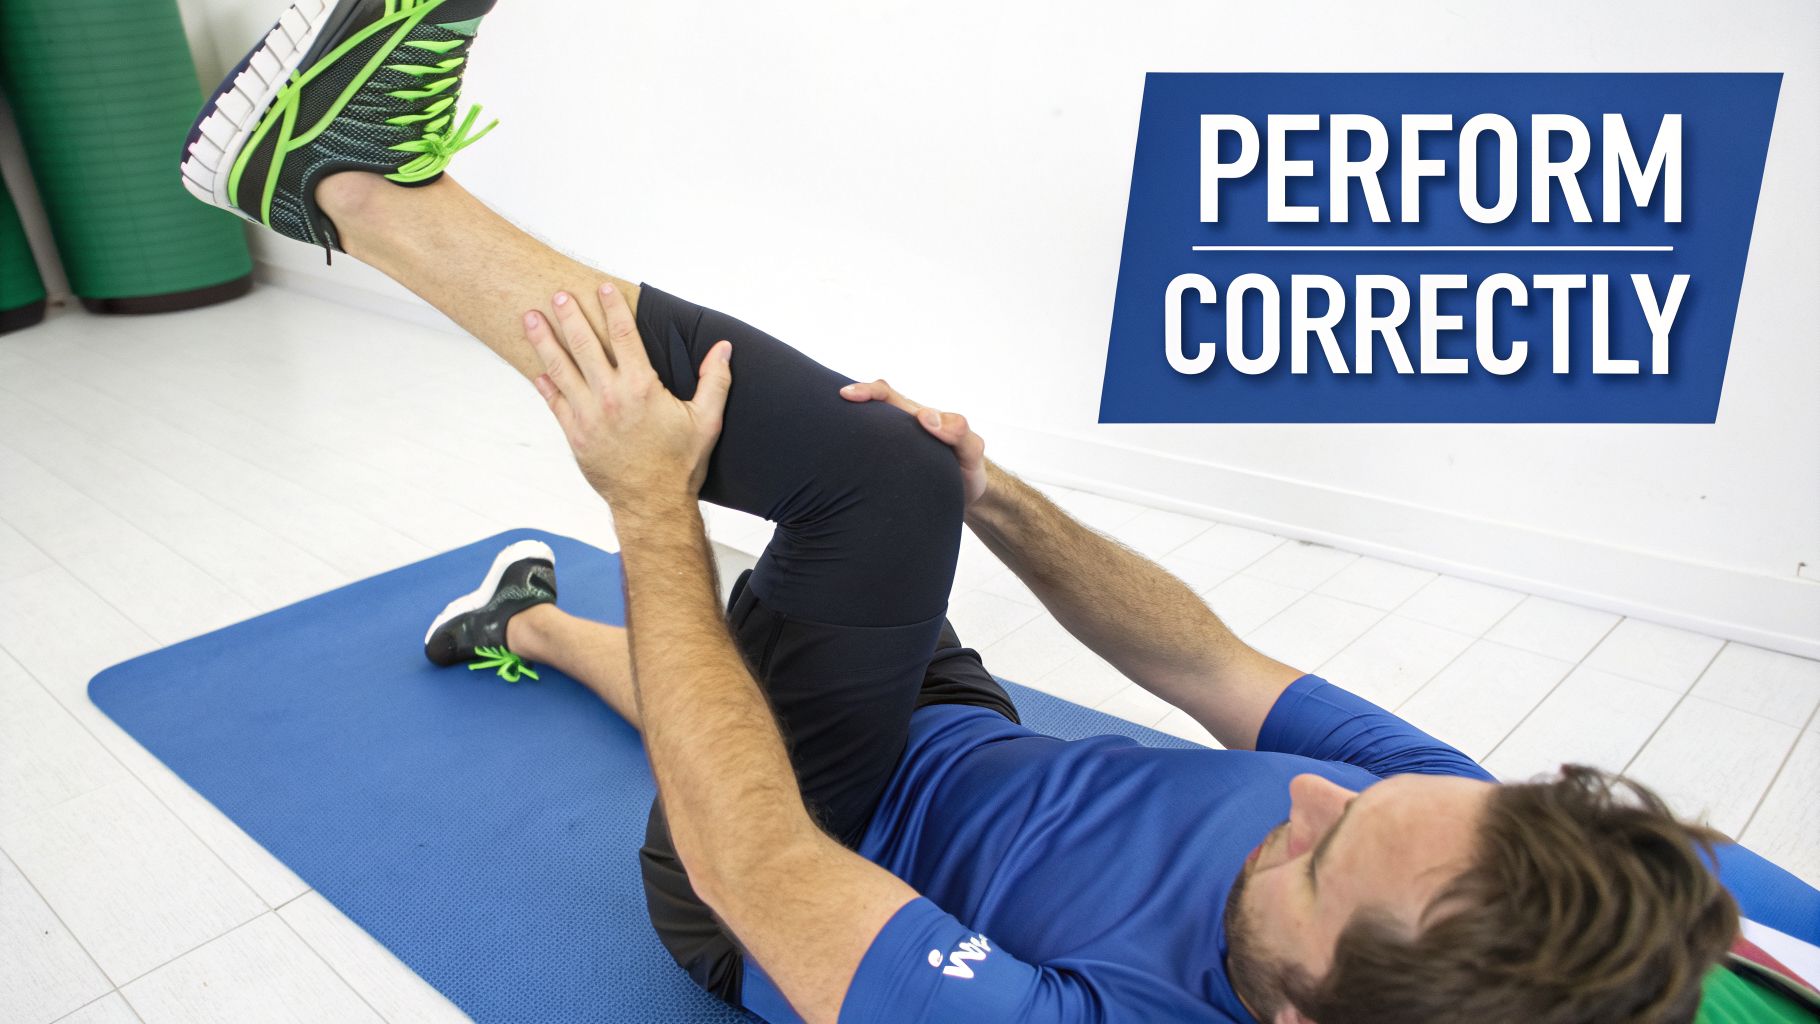
From here, lift one leg and cross the ankle over your opposite thigh, placing it just above the knee. This creates the classic 'figure 4' shape that gives the stretch its name.
Key Coaching Cue: Before you go any further, flex the foot of your crossed leg by gently pulling your toes back toward your shin. This one small move protects your knee joint from any unwanted twisting as you deepen the stretch.
Deepening the stretch with control
Now it's time to gently apply pressure. Reach your hands through the gap you've created between your legs, interlacing your fingers behind the thigh of your supporting leg (the one still on the floor). For a more intense sensation, you can also grasp the top of your shin if your flexibility allows.
Slowly and with complete control, pull that supporting leg toward your chest. You should feel a distinct stretch in the glute and outer hip of the leg that's crossed over. Only pull until you feel a comfortable, moderate stretch—never pain.
Your breath is your best tool for releasing tension here.
- On your inhale: Focus on relaxing into the shape you've created. Don't fight it.
- On your exhale: Gently deepen the stretch, perhaps pulling your leg a fraction of an inch closer to your chest.
This rhythmic breathing is key because it signals to your nervous system that it's safe to let go, allowing the muscle to release more fully. If you're looking to build strength on top of this new mobility, our guide to Pilates reformer exercises is a great next step.
Holding and releasing the stretch
Hold the position for 30 to 60 seconds, maintaining those deep, steady breaths. Pay close attention to your upper body. If your shoulders are rounding or your head is lifting off the mat, you're pulling too hard.
Ease back just enough to keep your shoulders and head relaxed on the floor. Your lower back should also stay relatively neutral, not pressing hard into the ground or arching dramatically.
When you're ready to release, slowly undo your hands and let your supporting foot return to the floor. Then, uncross your other leg. Take a breath or two before switching sides to give your body a moment to reset. Always stretch both hips for balance.
Common stretching mistakes and how to fix them
The supine figure 4 looks simple, but a few common missteps can rob you of its benefits and even cause strain. Getting the small details right is the key to unlocking real relief.
The goal here is a clean, targeted stretch in the glute—not a tug-of-war with your body.
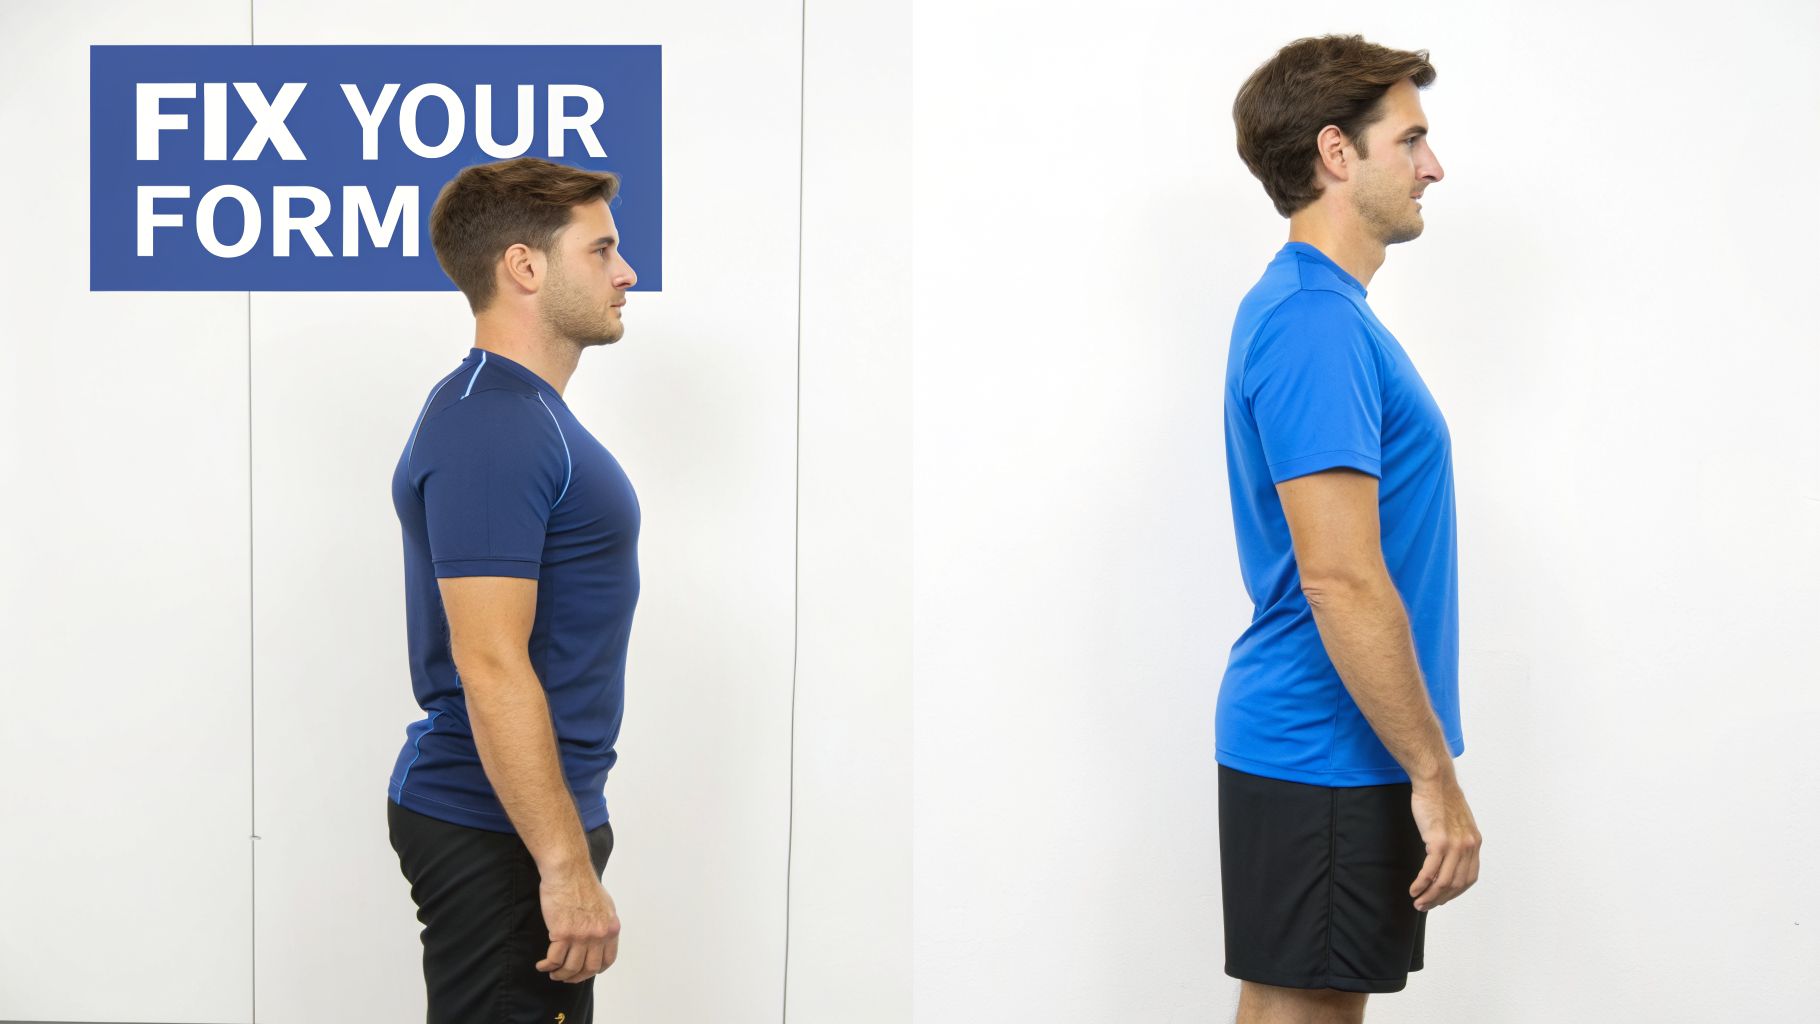
Rounding your lower back
One of the first things to go wrong is the lower back peeling off the floor. As you pull your supporting leg in, it’s tempting to get overeager and lift your hips and tailbone off the mat. When your back rounds, you lose the stable base you need to isolate the hip.
The Fix: Think about keeping your lower back and sacrum—that flat, bony plate at the base of your spine—firmly anchored to the ground. Only pull your knee in as far as you can while maintaining this connection. If you feel your hips start to curl up, you’ve gone too far. Back off a bit.
Your lower back should feel neutral. Don't force it flat or let it arch. The idea is to maintain the natural, gentle curve of your lumbar spine throughout the stretch.
Letting your hips tilt sideways
Here's another classic cheat: as you pull your knee in, you let your hips rock to one side. You might notice the hip of your supporting leg hiking up toward your armpit. This is your body's sneaky way of finding an easier path, but it shifts the stretch away from the glute and piriformis.
The Fix: Keep both hips square and level on the floor. I often tell clients to imagine their pelvis is a bowl of water they’re trying not to spill. This mental cue instantly helps you engage your core, which makes sure the stretch stays exactly where you want it: deep in the outer hip of your crossed leg.
Forcing the stretch or bouncing
Pushing into sharp pain or using jerky, bouncing motions is the fastest way to get nowhere. When your body senses you're forcing a stretch, a protective mechanism called the stretch reflex kicks in. Your muscles instinctively tense up to prevent injury—the exact opposite of what you’re trying to achieve.
The Fix: Treat the supine figure 4 as a slow, controlled negotiation with your muscles.
- Hold the stretch at a point of mild to moderate tension. It should never feel sharp or painful.
- Breathe into it. Take a deep inhale to prepare, then use your long, slow exhale to gently ease a little deeper.
- Absolutely no bouncing. This can cause micro-tears in the muscle fibers and will only set you back.
Nailing these small details makes all the difference. It ensures you get all the relief from the supine figure 4 with none of the risks. A mindful, patient approach will always win out over an aggressive one.
Modifications for every fitness and flexibility level
Not all hips are created equal, and your flexibility can change from one day to the next. The beauty of the supine figure 4 is that it's not a one-size-fits-all stretch. You can easily tailor it to meet your body where it’s at on any given day.
Whether you're dealing with tight hips or you're ready for a deeper release, there's a variation for you. The most important thing is to listen to your body and find that sweet spot—a good stretch, never pain.
For beginners and tight hips
Feel like you can't quite reach your leg? Or maybe when you pull, your head and shoulders lift off the floor? That’s a common roadblock, but these modifications give you the support you need to get the stretch right.
- Wall Assisted Supine Figure 4: This is my go-to recommendation for anyone just starting out or feeling extra stiff. Lie on your back with your feet flat against a wall, knees bent to about 90 degrees. Cross one ankle over the opposite thigh and just hang out there. To dial up the intensity, just slowly inch your hips closer to the wall. This lets gravity do most of the work, so your upper body can stay completely relaxed.
- Strap or Towel Assist: If you're close but can't quite get a good grip without straining your neck, a yoga strap, towel, or even a belt is your best friend. Loop it around the back of your supporting thigh, and you can gently guide your leg closer without compromising your form.
Poor hip external rotation is a surprisingly common problem. A 2024 analysis in Lancet Rheumatology found it affects 45% of adults over 40 and is linked to a threefold higher risk of lower back pain. The good news is that the supine figure 4 stretch can boost this range of motion by an average of 18% in just four weeks. Wall variations are especially powerful for those with limited strength, helping flatten the hips 60% more effectively than unsupported versions. You can read more about this in the Flexopedia longitudinal study on supine figure 4 variations.
Progressions for a deeper stretch
Once the standard version starts to feel easy and you’re no longer feeling a significant stretch, you're ready to explore a deeper variation.
The goal of a progression is to deepen the release in the target muscle, not to force your body into a new position. The sensation should remain in the glute and outer hip of the crossed leg.
Here are two simple ways to level up your supine figure 4:
- Active Knee Press: While holding the standard stretch, take the hand on the same side as your crossed leg and use it to gently press your bent knee away from your chest. This simple action actively encourages more external rotation at the hip, hitting your piriformis and deep glute muscles more intensely.
- Dynamic Figure 4: Instead of holding still, introduce some controlled movement. Slowly pull your legs toward your chest for a count of 3-5 seconds, feeling the stretch deepen, then slowly release back to the start. Repeating this gentle "rocking" for 8-10 reps is a great way to warm up the joint and coax it into a deeper stretch.
Pairing the stretch with modern recovery technology
The supine figure 4 is an effective stretch on its own. But when you want to get more out of your recovery time, pairing it with modern recovery systems can amplify its benefits. Think of it as creating synergy—turning a simple mobility drill into a comprehensive recovery protocol.
The secret is in the timing. Performing the stretch immediately before or after a session with a device like the Weyergans HighCare Vacustyler changes how your muscles respond. The Vacustyler uses intermittent negative pressure to boost circulation throughout your lower body, which sets the stage for a deeper, more effective stretch.
Enhancing your stretch with improved circulation
Imagine trying to stretch a cold, stiff rubber band. It doesn't give much. Your muscles are similar. Stretching them cold can feel difficult and often yields limited results. A 20-minute Vacustyler session floods your muscles with oxygen-rich blood, warming them from the inside out. When you follow that up with a supine figure 4, your muscles are far more pliable and ready to release.
This pre-stretch routine offers a couple of advantages:
- A Deeper Release: With the fresh blood flow, you'll likely find you can achieve a deeper, more satisfying stretch with less effort.
- Less Discomfort: The warmth and increased circulation can make the stretching sensation feel more comfortable and productive, especially if you’re dealing with very tight hips.
This combination is efficient, a huge plus for busy professionals and athletes. In fact, user feedback from over 5,000 sessions logged in 2026 at facilities using Weyergans HighCare technology showed that integrating this stretch into a Vacustyler routine cut post-training fatigue by 35%.
The data backs it up. A 2025 collegiate sports medicine review found that NCAA athletes using this combo not only had a 25% faster return-to-play but also saw the incidence of piriformis syndrome plummet from 12% to 4%. You can discover more about these findings on athletic recovery protocols.
Combining targeted stretching with circulatory enhancement is a game-changer. You're not just passively stretching; you're actively preparing the tissue to respond, which maximizes every second of your recovery time.
Maintaining mobility gains post-session
On the flip side, performing the supine figure 4 after your technology-assisted recovery session is a great way to lock in the benefits. Once the Vacustyler has done its job reducing swelling and boosting circulation, a gentle stretch helps you hold onto that newfound feeling of lightness and mobility.
This post-session stretch reinforces the gains you just made. It encourages the muscles to settle into a more relaxed, lengthened state, helping to prolong the positive effects of the treatment.
This strategy works for athletes chasing peak performance and medspa clients seeking better aesthetic outcomes and overall wellness. By pairing this stretch with modern tools, you create a more complete and effective recovery experience. For more ideas on what works, check out our guide on the best recovery tools for athletes.
Your supine figure 4 questions, answered
It's natural to have questions when you're dialing in a new stretch. Let’s tackle some of the most common queries I hear about the supine figure 4. Getting these details right is the key to unlocking the full benefits of the movement and performing it with confidence.
How long and how often should I do this stretch?
When it comes to mobility, consistency wins over intensity. There's no need to push into painful holds for minutes on end.
For general hip health and to undo the damage of daily sitting, a simple goal is to hold the stretch for 30 to 60 seconds on each side. Aim for 2 to 3 sets.
This is a gentle enough stretch that you can do it daily. Many people find it’s the perfect way to ease into their morning, while others prefer it in the evening as a way to unwind before bed. It’s also an ideal fit for any post-workout cool-down.
If you’re dealing with a specific issue like piriformis syndrome, your physical therapist might prescribe a different protocol, such as more frequent, shorter holds throughout the day. The most important rule? Always listen to your body.
Is a pinching feeling in my hip normal?
No, absolutely not. A sharp or pinching sensation, especially in the front of your hip, is a red flag telling you to stop.
The goal is to feel a deep stretch in the glute and outer hip of the crossed leg—never a pinch. That pinching feeling can signal an underlying issue like hip impingement, but more often, it's a sign that your form needs a small adjustment.
If you feel a pinch, immediately back off. Reduce how hard you're pulling the supporting leg toward you. Try slightly changing the angle of your crossed leg. If the sensation persists, stop the stretch entirely and consult a physical therapist to get to the root of the issue.
What's the difference between supine figure 4 and pigeon pose?
Both are fantastic stretches for the external hip rotators, but they are not interchangeable. The difference is the amount of pressure placed on your knee joint.
- Supine Figure 4: You're on your back, which gives you complete control. You dictate the intensity by how much you pull your supporting leg in. This removes almost all direct pressure from the knee of the stretching leg, making it a much safer starting point for people with tight hips, limited flexibility, or knee sensitivities.
- Pigeon Pose: This is an upright pose where your body weight automatically adds intensity. If your hips don't have enough external rotation to get into the position correctly, that force has to go somewhere—and it often gets transferred into the knee joint, creating a risky twisting force.
Because of this, I always recommend the supine figure 4 as the foundational stretch. It allows you to build the hip mobility you need safely before you consider attempting more advanced poses like pigeon.
Can this stretch help my sciatica or lower back pain?
It often can, especially when your pain is caused by muscle tightness rather than a disc or nerve root issue. In fact, many cases of "sciatica" are actually piriformis syndrome—a condition where a tight piriformis muscle presses directly on the sciatic nerve.
The supine figure 4 directly targets the piriformis, helping to release that tension and alleviate the radiating nerve pain. This stretch also addresses a common cause of lower back pain: stiff hips. When your hips can't move freely, your lower back is forced to compensate, leading to strain and achiness. Loosening the hips gives your back a much-needed break.
However, not all back pain is the same. If your pain is severe, comes with numbness or weakness, or you suspect it’s from something like a herniated disc, you must see a doctor before starting any new stretching program.
Ready to combine this foundational stretch with cutting-edge recovery technology? The Weyergans HighCare US Vacustyler creates the perfect environment for deeper, more effective stretching by enhancing circulation and preparing your muscles for release. Discover how you can elevate your recovery and achieve new levels of mobility by visiting weyerganshighcareus.com.