

You have your at-home microneedling device and you’re ready to start. The biggest question I hear is, "How often should I actually be doing this?" It’s a good question, because more isn't always better.
For most people using common at-home needle lengths, like 0.25mm to 0.5mm, the sweet spot is once every one to two weeks. This gives your skin enough time to heal and start producing collagen without becoming overworked and irritated.
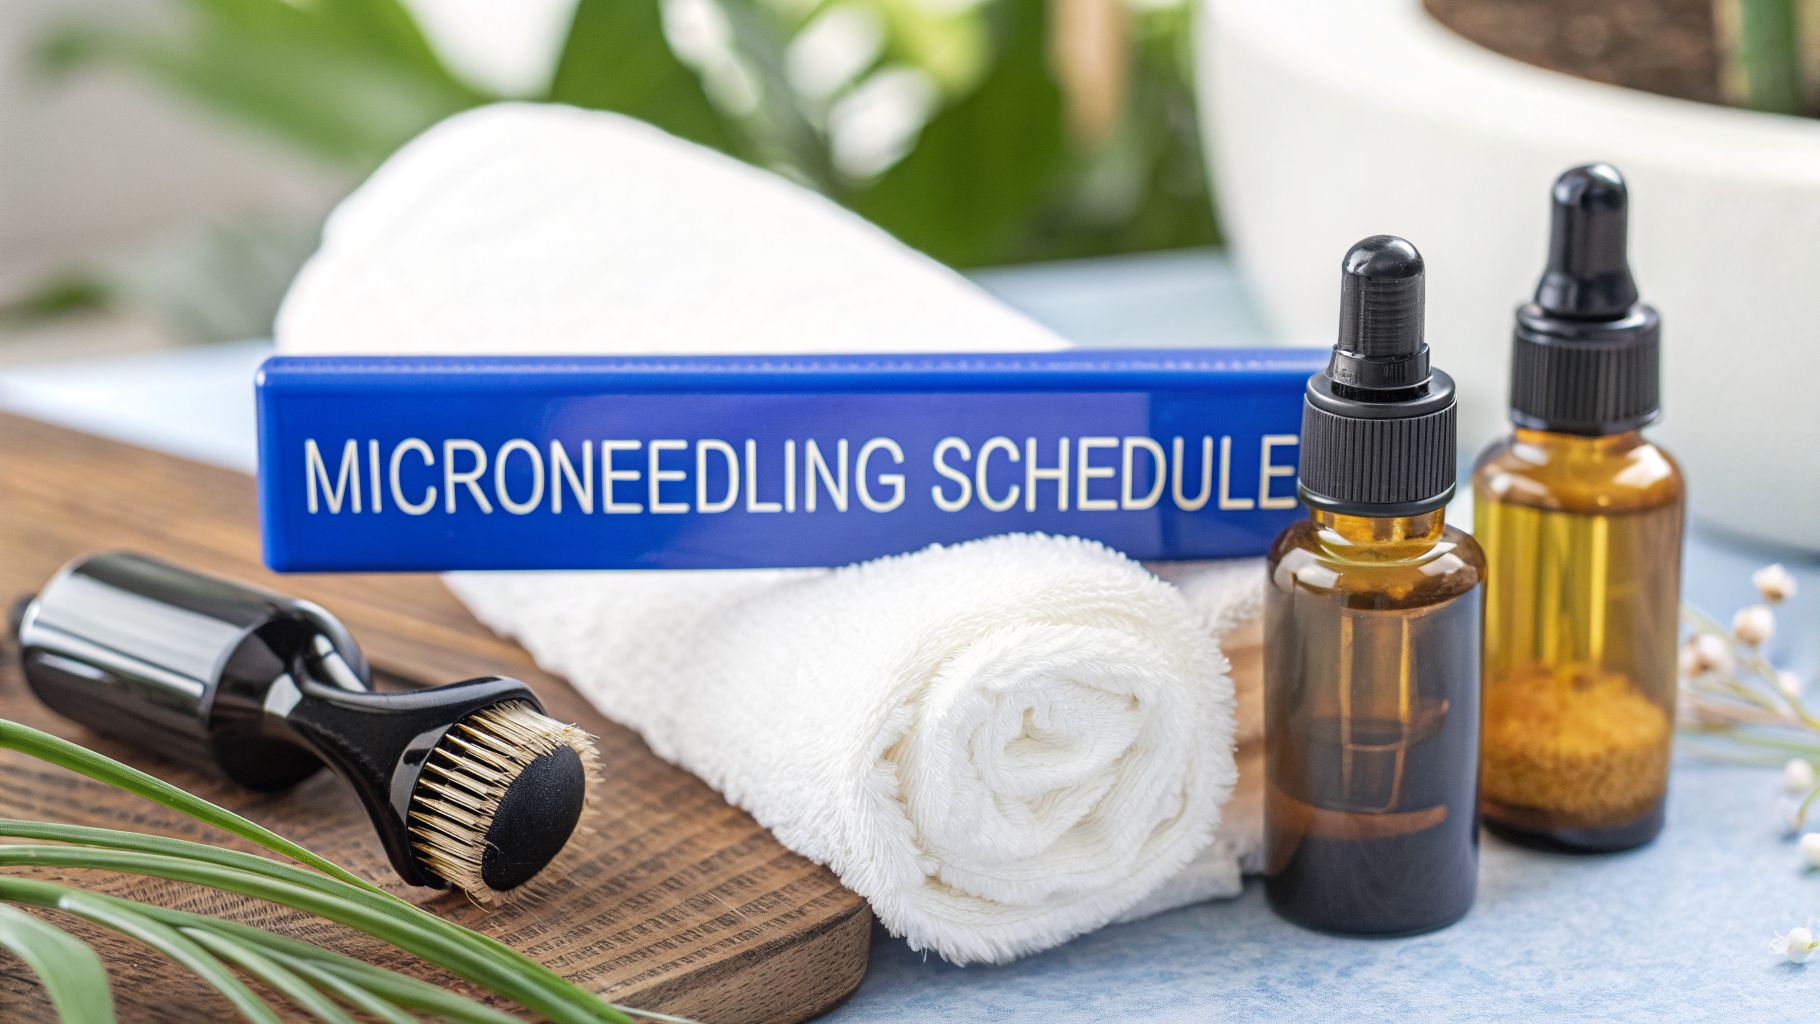
Setting your at-home microneedling schedule

Finding the right microneedling frequency isn't a one-size-fits-all process. The right schedule depends on your skin's tolerance, the needle length you're using, and what you’re trying to achieve.
Think of it like a workout for your skin. Just as your muscles need rest days to repair and grow stronger, your skin needs recovery time to regenerate after a microneedling session.
Pushing your skin too hard by rolling too often can lead to irritation, inflammation, and even damage. Remember, the point is to gently stimulate the skin's natural healing process, not to overwhelm it. Finding that balance is the secret to getting visible, long-lasting results safely.
The foundation of a safe routine
Most at-home microneedling devices use needles that are 0.5mm or shorter. These shorter lengths are great for boosting product absorption and addressing surface-level concerns like fine lines, dullness, and uneven texture.
Because the micro-injuries they create are shallower than a professional treatment, your skin recovers quickly.
This rapid recovery is why you can do it more often. Many people successfully roll every 7-10 days using these shorter needles. This rhythm helps with cell turnover and collagen production without the risks that come from overdoing it. You can learn more about expert-recommended microneedling frequencies to see what might work for you.
A consistent, patient approach will always win over an aggressive one. The most important rule is to listen to your skin. If it feels sensitive or looks irritated, give it more time to heal before your next session. No exceptions.
To help you get started, here's a quick reference table that breaks down recommended frequencies based on common at-home needle lengths.
Recommended at-home microneedling frequency by needle length
| Needle Length (mm) | Recommended Frequency | Primary Goal |
|---|---|---|
| 0.1mm – 0.2mm | Every other day | Enhanced product absorption ("nano-needling") |
| 0.25mm | Every 7-10 days | Improved texture, fine lines, and overall radiance |
| 0.3mm | Every 10-14 days | Mild hyperpigmentation and surface texture |
| 0.5mm | Every 2-3 weeks | Mild acne scars, deeper fine lines, and firmness |
This table is a good starting point, but always adjust based on how your skin responds.
Factors that influence your schedule
A few key things will help you dial in the right routine. Consider all of them before locking in a schedule.
- Needle Length: This is the biggest factor. As you can see from the table, shorter needles (0.1mm-0.25mm) can be used more often, while longer ones (0.3mm-0.5mm) require more recovery time.
- Skin Sensitivity: If your skin is naturally sensitive, start cautiously. Try longer intervals, maybe every three or four weeks, and see how you feel. You can always shorten the time later.
- Your Skincare Goals: Are you trying to get a healthy glow, or are you targeting something specific like mild acne scars? Deeper concerns might call for different timing.
- Recovery Speed: Pay close attention to how quickly your skin returns to normal. For most at-home treatments, any redness should be gone within 24 hours. If it lasts longer, you need more time between sessions.
By keeping these basics in mind, you can build a safe and effective routine that gets you closer to your goals without harming your skin. In the rest of this guide, we'll break these factors down even further.
How needle length defines your microneedling schedule

When you're trying to figure out how often to microneedle at home, one factor stands above the rest: the length of the needles on your device. This isn't just a small detail—it's the master key to your entire treatment schedule.
The rule of thumb is simple. Shorter needles create less trauma and allow the skin to recover quickly, meaning you can do it more often. Longer needles go deeper to trigger more significant changes, and that requires more healing time.
Getting this relationship right is the secret to a safe and effective routine. Trying to speed things up by using longer needles too frequently won't get you better results. It can lead to irritation, inflammation, and potential skin damage. Let’s walk through the common needle sizes for home use and what kind of schedule they demand.
Shorter needles for product absorption (0.1mm to 0.25mm)
Needles in the 0.1mm to 0.25mm range are the shallowest you'll find, and their main job isn't to trigger a deep collagen response. Instead, they create thousands of tiny, superficial channels in the top layer of your skin (the stratum corneum).
This process, sometimes called "nano-needling," has one great benefit: it dramatically boosts the absorption of your skincare products. Your serums and creams can sink in and get to work instead of sitting on the surface.
Because these needles are so short and the treatment is so gentle, recovery is almost instant. You might see a little pinkness for an hour or two, but that’s it. This minimal downtime allows for a frequent schedule.
- Recommended Frequency: Anywhere from every other day to a few times per week.
- Best For: Making your existing skincare routine much more effective and giving your skin a brighter, more hydrated glow.
Think of it like aerating your lawn before you water it. Those little holes let water and nutrients sink down to the roots. A 0.25mm needle does the same thing for your favorite serums.
Medium needles for collagen induction (0.3mm to 0.5mm)
When you step up to the 0.3mm to 0.5mm range, the game changes. The goal here shifts from simple product absorption to true collagen induction. These needles are long enough to reach past the outer skin layer and into the upper dermis—where your skin makes collagen and elastin.
This creates a controlled micro-injury that kicks your body's natural healing process into high gear. Your skin gets the signal to build new, healthy collagen to repair those channels. This is what softens fine lines, smooths out skin texture, and can fade mild scarring over time.
But this deeper work demands a bigger recovery window. Your skin needs time to go through its full healing cycle and build that fresh collagen framework. If you treat too often, you're constantly interrupting that process, which leads to chronic inflammation.
A 0.5mm needle is more like tilling the soil in a garden. It goes deeper to break up old, compacted patterns and encourage fresh, healthy growth from below. That kind of intensive work requires a proper rest period to see the best results.
For this reason, your schedule must be more conservative.
- Recommended Frequency: Typically once every one to four weeks.
- Best For: Targeting fine lines, uneven texture, enlarged pores, and light hyperpigmentation.
If you’re just starting out, stick to the cautious side of this range—once every three or four weeks is perfect. As your skin gets used to the treatment, you might find you can handle a bi-weekly session. The golden rule is to listen to your skin. If you’re still red or sensitive more than a day later, give it more time. Patience is how you win this game safely.
Matching your routine to specific skin goals
General guidelines are a great starting point, but you can dial in your microneedling schedule for what you’re trying to achieve. A routine designed to tackle dark spots will look very different from one aimed at softening fine lines. The key is to match the right needle depth with the right frequency for your specific goal.
This approach ensures you're working efficiently and effectively without stressing your skin. Remember, consistency is always better than aggression. A patient, steady routine over several months will give you far better—and safer—results than going too hard, too fast.
For fine lines and wrinkles
To soften the appearance of fine lines, the goal is to consistently stimulate collagen without overdoing it. This requires a needle that can reach the upper dermis, starting that renewal process without requiring significant downtime.
- Needle Length: A 0.5mm needle is the ideal tool for the job.
- Frequency: Plan your sessions for every 3-4 weeks.
This time frame is important. It gives your skin enough breathing room to complete its healing cycle and build the new collagen and elastin that lead to firmer, smoother skin. If you do it too often, you interrupt that process and end up with inflammation instead of rejuvenation.
For hyperpigmentation and uneven tone
Fading sun spots, old acne marks, or general blotchiness requires a two-part strategy. You need to encourage your skin to turn over new cells while also making sure your brightening serums can get where they need to go.
- Needle Length: A 0.3mm to 0.5mm needle works perfectly here. A 0.5mm needle helps with deeper pigment, while a 0.3mm is great for maintenance and boosting product absorption.
- Frequency: A session every 2-3 weeks is highly effective.
This rhythm helps to gently break up stubborn pigment clusters and allows active ingredients like niacinamide or vitamin C to work their magic on the fresh skin cells coming to the surface.
Don't forget, microneedling makes your skin extra sensitive to the sun. Being diligent with a good broad-spectrum sunscreen is completely non-negotiable, especially when you're treating hyperpigmentation. You don't want to undo all your hard work.
For enlarged pores and texture
Improving the look of large pores and rough texture isn't about deep collagen remodeling. It's more about refining the skin's surface for a smoother finish. You can achieve this with a gentler, more frequent approach.
- Needle Length: A 0.25mm to 0.3mm needle is all you need.
- Frequency: Aim for a session every 1-2 weeks.
This routine helps to slightly thicken the epidermis over time and keeps pores clear, which makes them appear smaller and more refined. It’s a great way to get that smooth, "glass skin" look by improving overall texture. It's also a fantastic strategy to boost the benefits of microneedling for jowls when used with professional treatments.
For mild acne scars
Tackling acne scars at home demands a serious amount of patience and caution. These scars often sit deeper in the skin, which is why professional treatments are almost always the better choice. If you’re determined to treat very mild, shallow scars at home, you'll need a longer needle—and that means a longer recovery period is mandatory.
While you might carefully attempt bi-weekly sessions at home, a professional protocol often involves four to six sessions spaced four weeks apart. This approach can lead to a 400% increase in collagen and elastin six months later. It also has a high satisfaction rate—87.5% in neck wrinkle trials—and leads to 80.6% of patients recommending the procedure to others. You can explore more about the effectiveness of professional microneedling treatments on DermapenWorld to see the difference.
- Needle Length: Use a 0.5mm needle, and only if you’re experienced.
- Frequency: Do not perform this more than once every 4 weeks.
This extended break is essential to allow for the deep healing required to remodel scar tissue. Pushing it any more frequently will likely worsen inflammation and could even lead to more scarring. And it should go without saying: never, ever microneedle over active breakouts.
Essential pre-treatment and post-treatment care

The success of at-home microneedling doesn’t just happen during the session itself. The before and after care is where you truly set yourself up for success.
Think of it like tending to a garden. You prepare the soil before planting seeds, and you water and protect the sprouts afterward. Your pre- and post-treatment routine is just that—it ensures safety and creates the perfect environment for your skin to heal, regenerate, and deliver results.
Your pre-treatment checklist
Before you pick up your device, you need to prep your skin. This is a non-negotiable part of the process that creates a clean, safe slate for your skin and your tool.
1. Hit pause on active ingredients: For at least 48-72 hours before your session, stop using any strong active ingredients. This means putting away your retinoids (like retinol), exfoliating acids (think glycolic or salicylic acid), and potent vitamin C serums. Using these too close to microneedling is a recipe for serious irritation.
2. Cleanse, cleanse, cleanse: On the day of your treatment, wash your face with a gentle, basic cleanser. You want to remove every trace of makeup, oil, and daily grime. Pat your skin completely dry with a fresh, clean towel.
3. Disinfect your device: This is the most important safety step. Submerge the head of your microneedling tool in 70% isopropyl alcohol and let it soak for a good 5-10 minutes. Afterward, let it air dry completely. Never skip this step—it’s your best defense against introducing harmful bacteria into your skin.
Your post-treatment recovery plan
Once your session is done, your skin is vulnerable. Those tiny micro-channels are open, and your mission shifts to calming, hydrating, and protecting your skin while it begins the healing process. What you do here can make or break your results.
Your immediate goal is to soothe any redness and flood the skin with hydration. Your skin is primed for absorption, so this is the time to feed it ingredients that support repair.
Your post-microneedling routine is all about supporting the healing process, not rushing it. The skin is working hard to build new collagen, and your job is to give it the gentle, hydrating tools it needs to do its best work.
For the next 24-48 hours, stick to this simple protocol.
- Apply soothing serums: Right after you finish, apply a gentle, hydrating serum. Hyaluronic acid is the hero ingredient here—it pulls moisture deep into the skin, which helps calm redness and gives a plump, hydrated feel. Peptides are another great choice for encouraging skin repair.
- Avoid all harsh products: Just like before your session, stay away from retinoids, acids, and vitamin C for at least 48 hours. You’ll also want to skip makeup, anything with fragrance, and heavy creams that could clog those fresh micro-channels.
- Become a vampire: Your skin will be extremely sensitive to UV rays. Sun exposure now can trigger inflammation and lead to unwanted hyperpigmentation. If you must be outside, use a broad-spectrum mineral sunscreen (SPF 30+) and wear a wide-brimmed hat.
- Skip the gym: Hold off on intense workouts, saunas, and steam rooms for at least 24 hours. The excess heat and sweat can ramp up inflammation and create an environment where bacteria can thrive.
By diligently following these pre- and post-treatment steps, you can safely answer the question of how often to microneedle at home for you, knowing you’re getting the most out of every single session.
For those looking for calming and reparative ingredients, you can learn more about the benefits of Centella Asiatica for skin, which is an excellent choice for post-treatment care.
Know the risks and when to hit pause

The results from at-home microneedling depend on one thing: putting safety first. Figuring out how often to microneedle at home is right for you is important, but knowing the risks and when to stop is critical. If you ignore the rules, you can easily do more harm than good.
The biggest risk is infection. A tool that isn't perfectly sterilized can push bacteria deep into your skin, triggering breakouts or something worse. Your technique matters, too. Dragging a roller can create tiny tears, and pressing too hard can damage the delicate structures underneath.
When you should avoid microneedling completely
Microneedling works by creating a controlled injury to kickstart your skin's healing process. This means it should only ever be done on healthy, intact skin. There are a handful of situations where you should never microneedle at home, as it will only make things worse.
Steer clear of microneedling if you have any of these:
- Active Acne: Never roll over active pustules or cysts. You’ll just spread bacteria all over your face, which can lead to more breakouts and scarring.
- Eczema or Psoriasis: These conditions mean your skin barrier is already compromised. Microneedling will only add fuel to the fire, causing more irritation and flare-ups.
- Active Rosacea: The micro-injuries can trigger a major inflammatory response, cranking up redness and sensitivity.
- Open Wounds or Sores: This one should be obvious—never microneedle over cuts, cold sores, or any other broken skin.
If you’re dealing with any of these, talk to a dermatologist for professional advice. It's always a good idea to explore whether at-home microneedling is safe for your specific skin before you start.
How to spot the signs of over-treatment
It’s easy to get a little too enthusiastic, but your skin will tell you when you’ve gone too far. Pushing past these warning signs leads to inflammation and damage—the exact opposite of what you’re trying to achieve. Learning to read your skin's signals is key to a successful routine.
Over-treatment doesn't speed up results; it slows down healing. Listening to your skin is the most effective way to ensure a safe and successful microneedling journey. Take a break if your skin tells you it needs one.
Keep an eye out for these red flags:
- Redness That Lingers: A little pinkness for up to 24 hours is normal. But if your skin stays red, flushed, or inflamed for days, you’re being too aggressive or doing it too often.
- Persistent Irritation: After the initial recovery, your skin should feel calm. If it stays sensitive, itchy, or tight, it's a clear sign your skin barrier is struggling.
- Visible Track Marks: Seeing faint lines or a grid pattern means you're using bad technique or too much pressure. Stop immediately and let your skin heal completely.
- More Breakouts: While a little "purging" can happen at first, a sudden explosion of pimples usually means bacteria got in or your skin is highly inflamed.
If you notice any of these symptoms, stop all treatments right away. Give your skin a few weeks to fully recover. Once it’s back to normal, you can think about starting again—but this time, reduce the frequency, use less pressure, or switch to a shorter needle length.
Weaving microneedling into your skincare routine
Smart skincare choices can make a night-and-day difference in your microneedling results. This isn't about piling on more products, but about being strategic—using the right things at the right time. After a session, your skin is wide open and incredibly receptive, so what you apply directly fuels the healing process and shapes your final outcome.
Think of your freshly treated skin as a sponge, ready to soak up whatever you give it. The goal is simple: hydrate and repair. You want to feed it calming, healing ingredients that support the regeneration you just worked so hard to start.
What to use after microneedling
Right after you finish a session, your focus needs to be on simple, pure, effective hydration. The tiny micro-channels you created allow products to penetrate deeper than ever, so this is the time for ingredients that soothe and rebuild.
Your go-to ingredients should be:
- Hyaluronic Acid: This is the undisputed champion of post-microneedling care. It’s a moisture magnet that pulls water into the skin, which is exactly what you need to calm redness, ease that tight feeling, and keep the healing environment perfectly hydrated.
- Peptides: These are the building blocks for collagen and elastin. Applying a good peptide serum after a session gives your skin the raw materials it needs to support its natural repair and rebuilding process.
What to avoid after microneedling
Knowing what to steer clear of is just as important as knowing what to use. For at least 48-72 hours after your session, you need to press pause on all strong, active ingredients. Putting them on freshly treated skin is a recipe for serious irritation, inflammation, and can even undo the benefits of your treatment.
Keep these ingredients far away from your skin for a few days:
- Vitamin C (Ascorbic Acid): While it's a great antioxidant for regular use, its high acidity is way too harsh for vulnerable, post-procedure skin. It will sting and irritate.
- Retinoids (Retinol, Tretinoin): These cell turnover powerhouses are far too aggressive for skin that's in repair mode. Using them too soon will lead to major redness, sensitivity, and peeling.
- Exfoliating Acids (AHAs/BHAs): Glycolic, lactic, and salicylic acids are a definite no-go. Your skin has just undergone a significant mechanical "exfoliation" from the needles; adding chemical exfoliants on top will only cause damage.
A sample weekly skincare schedule
To pull it all together, here’s a simple schedule showing how to adjust your routine around your microneedling day. Let’s pretend you microneedle on a Sunday evening.
What you put on your skin right before and after your session is a key part of the process. You're aiming to create the perfect healing environment—clean, calm, and hydrated—while avoiding anything that could cause irritation or hinder the natural repair cycle.
This table breaks it down into a simple guide.
Skincare product guide for microneedling days
| Timing | Use These Ingredients | Avoid These Ingredients |
|---|---|---|
| Immediately Before | Gentle, non-active cleanser | All retinoids, acids, and physical exfoliants |
| Immediately After | Hyaluronic acid, peptide serums | All actives, makeup, and heavy occlusive creams |
| The Next 48 Hours | Gentle cleanser, hyaluronic acid, simple moisturizer, mineral sunscreen | Vitamin C, retinoids, AHAs/BHAs, chemical sunscreens |
By following this simple use-and-avoid framework, you set your skin up for a smooth, successful recovery. This disciplined approach helps you get the most out of every single session and is key to safely figuring out how often to microneedle at home is right for you. A supportive routine isn't just an afterthought—it's the key to unlocking consistent, beautiful results.
Frequently asked questions about at-home microneedling
Even with the best plan, questions always come up when you’re starting a new skincare routine. Getting straightforward answers is the key to feeling confident as you begin microneedling at home. Let’s tackle some of the most common questions to clear up any confusion.
How long until I see results?
This is the big one, and the honest answer is: it depends on your goals. You'll probably notice some immediate effects, like a plumper, more radiant look within the first week as your skin’s initial healing response kicks in. This early glow is a great sign you're on the right track.
However, the real, lasting changes are happening on a deeper level. It takes time for your skin to generate new, healthy collagen.
- Surface Improvements (1-2 weeks): Your skin will likely feel smoother and look noticeably brighter.
- Deeper Changes (4-6 weeks): This is where the magic of collagen remodeling starts to become visible. You’ll begin to see a real softening of fine lines and a more even skin tone.
- Long-Term Results (3-6 months): With consistent, properly spaced sessions, you’ll see the most significant improvements in skin firmness, texture, and overall resilience.
The most visible results typically appear 4 to 6 weeks after a session. Patience is your best friend here; collagen doesn't build overnight, but a steady routine delivers cumulative, lasting benefits.
When should I replace my microneedling device?
This is an important safety question, so pay close attention. The tiny needles on your device become dull with every use. Using a dull roller or pen tip isn't just less effective—it can tear and damage the skin instead of creating clean micro-channels. This can lead to unnecessary irritation and even scarring.
As a firm rule, you should replace your derma roller head or pen cartridge after about 10-15 uses. But here’s the most important tip: if you ever feel the needles dragging or snagging on your skin, it’s time to replace it immediately, no matter how many times you’ve used it.
Can I combine microneedling with other treatments?
Yes, but timing is everything. You can definitely incorporate microneedling into a larger skincare strategy, but you must give your skin enough time to heal between different treatments.
- Gentle Facials: Wait at least 48-72 hours after microneedling before getting a gentle, hydrating facial.
- Chemical Peels or Microdermabrasion: You need a much longer break. Give your skin at least 2-4 weeks between these more aggressive treatments and a microneedling session to avoid over-exfoliating and wrecking your skin barrier.
- Botox or Fillers: It’s widely recommended to wait at least 2 weeks after getting injectables before you microneedle that same area.
When in doubt, always talk to a professional to map out a treatment schedule that is both safe and effective for your skin.
Ready to elevate your recovery and aesthetic outcomes? The Weyergans HighCare US Vacustyler system uses German-engineered vacuum technology and beauty light to enhance circulation and support skin tone. Discover a modern, science-driven approach to wellness at https://weyerganshighcareus.com.